|
Author: Skip
Motor Mount Choices for the 944. Diagnosis:
Motor mounts are designed to absorb vibration from the 944's water-cooled engine. Here are some warning signs that yours may need to be replaced:
-
Excessive vibration when starting or stopping the engine
-
Excessive vibration at idle (even when warm, assuming the problem is not with the engine itself)
-
Try pulling down on the engine using the header for leverage. It should move a small amount (2-4mm)
-
Cracks or splitting in the rubber, or noticeable leaks of the damping fluid.
-
You can actually measure the motor mount to find out if it's collapsed. Measured from upper to lower mounting surface... New they are 70mm +/- 1mm, anything less than 62mm installed, or 65mm not installed should be considered failed.
Porsche recommends you change the motor mounts every 36,000 miles. These items are subject to wear just like any other part in the drive train. The right (passenger) side will usually be first to fail due to it's proximity to the header. Many say it is harder to change, but my experience was that both sides were equally challenging. The mechanics labor manual states 2.3 hours for the right, but only 1 hour for the left. If you have the right side replaced and want to do the left also, my estimate is that it only adds 15 minutes to the labor, vice the full hour.
Conjecture:
There is a lot of hype about how hard it is to replace motor mounts. Believe me...it is not that bad. No special tools are needed and you do not have to remove or disassemble any of the engine, torque tube, or transaxle components. It took me approximately four hours over two nights to complete this maintenance. I had to stop and wait for another motor mount to be shipped when I found that both sides were shot. I also messed around with some other stuff and did some cleaning. Even for the first timer, I imagine this job could be completed in under two hours.
Choosing the proper mount(s):
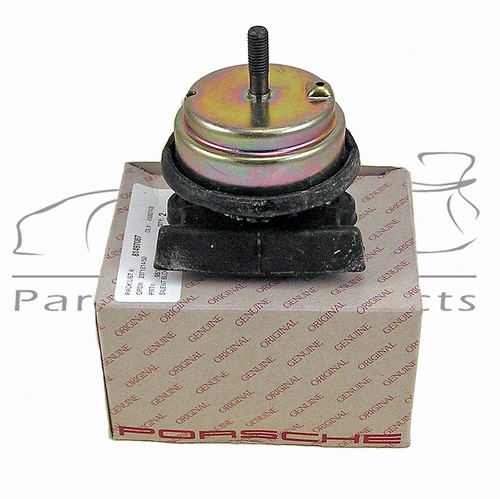
Starting with the 86 951, all 944 series engine mounts were of the new design. Be sure you do not use the old design (if there are any still out there).
As with everything, there is an aftermarket replica of the OEM part. The aftermarket units simply do not last as long as the OEM units - they are available, but not recommended.
Procedure:
-
Remove the Air box/air flow meter. (10mm, Slot-head screwdriver)
-
Loosen the lug nuts on the front wheels (19mm socket)
-
Jack up the front or the entire car and place it on jack stands. (Hydraulic jack, 2-4 jack stands)
-
Remove the front wheels. (19mm socket)
-
Remove the lower engine shield. (10mm socket)
-
Find a way to support the engine with the supplies that you have. During this maintenance you will be removing the cross-member which holds the engine in place. I used two hydraulic jacks. One under the bell housing by the starter and another under the oil pan. I also used a piece large piece of hardwood between the oil pan and the jack to disperse the load. You should be careful with the cast aluminum construction of the oil pan.
-
Remove the sway bar mounting brackets at the frame connection point. (13mm socket)
-
Remove the nut holding the power steering line directly above the inside front of the A-arm. (10mm socket)
-
Separate the A-arms from the body by removing the front bolt connected through the cross-member and the two rear bolts connected to the frame. Use a marker or paint (or scribe) to mark the location of the rear mounting point (caster block) for reinstallation to try and avoid the need for an alignment. (19mm socket, 17mm socket)
-
Move the A-arm assembly down and out of the way to expose the lower nut of the motor mount.
-
Remove the lower nut off the motor mount. (17mm socket)
-
Remove the top bolts, 2 each side, holding the motor mounts to the engine. On the right side you will probably have to use a wrench. On the left side you can get to the bolts from the top with a long extension through the space where the airbox was. The old style motor mounts used a nut/bolt arrangement which may be a bit harder to get apart than the newer style which uses a bolt only. (13mm socket, 13mm wrench)
-
Remove the 4 bolts, 2 each side, holding the cross-member to the frame. Be careful with the power steering line on the right side and the steering shaft linkage on the left. Some people prefer to leave the cross-member dangling by the four bolts and prying the new mounts up and in. I tried it that way but found that it was far to much hassle. (19mm socket)
-
Remove the motor mounts from the cross-member. The "update" mount actually pack themselves into the cross-member frame by inserting the flat rubber lip into the upper-outermost lip of the cross-member.
-
Now you are ready to install the new mounts. Make sure if you are changing from the old style mount to the "update" mount that you purchase the correct bolts and washers. Here some info:
-
Right side (passenger) - use 38mm bolts (900.378.024.02). Torque to 17ftlbs.
Left side (driver) - find "x" from the picture below. If x=21mm, use 38mm bolts (900.378.024.02). If x=25mm, use 42mm bolts (900.378.034.02). Torque to 17ftlbs.
Washers - use with each bolt (N.015.401.3)
-
It is also a good idea to pre-thread all your new bolt and nut fittings on the new mounts for ease of installation.
-
When installing the new mounts, be sure to set them into the cross-member first. This ensures that the flat rubber lip is in the right position prior to lifting the cross-member back up to the frame. Having a partner help at this point is a very good idea. It can be quite challenging to get the cross-member bolts started into the frame again.
-
Before getting the cross-member bolts snugged up to the frame you will want to start the top motor mount bolts. No need to tighten them until the cross-member is bolted up completely. I did not find any use for wedges or pry-bars as some may suggest.
-
Assembly from this point is pretty much the reverse of removal. Be sure to line up the rear mounts of the A-arms to the scribe marks you made earlier. This should keep you from having to get the alignment adjusted.
NOTE 1: If you're like me and put this maintenance off for a while, you will regret doing so. It's not that hard and it makes a huge difference in the cars performance and overall "fun to drive" factor.
NOTE 2: Oh yeah, don't forget to hook the electrical connector back on the Air flow meter. Car will start very rough and you will not be able to accelerate. No air = No go. Trust me :-(
Credits: Skip Grehan
| Related Articles |
> Window Express Kit Installation
> AC Delete
> Accusump Installation
> Adjustable Ride Height Kit - Paragon
> Alternator Replacement
> Brakes, front - 924S, 944, 944S
> Brey-Krause Strut Brace Installation - 944
> Camber Plate Installation (Paragon)
> Clock/Bulb Replacement, digital, Late 944 and 968
> Clutch Replacement - Part One
> Clutch Replacement - Part Two
> Clutch Slave Bleeder Valve Remote
> Control Arm Bushing Upgrade - Weltmeister
> Control Arm, Front - Info
> Coolant Flush
> DME Chip Installation
> Dash Replacement
> Engine Identification
> Engine Production
> Fuel Level Sender
> KLA Strut Brace Installation - 924S, 944, 968
> Koni Strut Conversion - 8641-1414S for late 944, 968
> Odometer Gear Replacement - late 944
> Oil Cooling, Auxiliary
> Oil Pressure Relief Valve
> Oil Pressure Sending Unit Replacement
> Rear Ride Height Adjustment
> Porsche Chronology
> Rear Spring Rates vs. Effective Rates
> Rear Wheel Bearing Diagnosis
> Rear Wheel Bearing Replacement - 924, early 944
> Rear Wheel Bearing Replacement - late 944, 968
> Ride Height Measurement
> Rod Bearing Replacement
> Shift Lever Rebuild
> Short Shift Kit
> Throttle Position Sensor
> Sway Bars - Info
> Torque Tube Rebuild
> Torsion Bar Replacement
> Transaxle Fluid - Info
> Transaxle Fluid Change
> Rear Sway Bar Installation
> Transaxle Replacement
> Heater Clip
> Window Regulator Replacement
> Seat Back Brace Installation Instructions
> KLA Strut Brace Installation - 968/944 S2/944 S
|
|
