|
Author: Skip
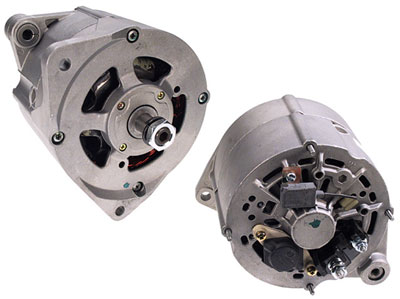
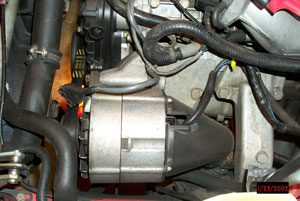
The alternator is located in the driver's side engine compartment, under the air-flow meter (AFM), in front of the Turbo unit, and on top of the A/C compressor looking down into the engine compartment from the front of the car.
The alternator is buried deep in a 944 Turbo car, and will take some time to clear all the plumbing around it to get to it, and takes some effort to actually get it out and replace it. The alternator comes out from the top of the car, not the bottom. You will need lots of patience !
Be Organized !
- Disconnect Battery Terminals (Negative First) !
- Jack car up on lift or place on jack stands.
- Remove underside aluminum and plastic belly pan trays.
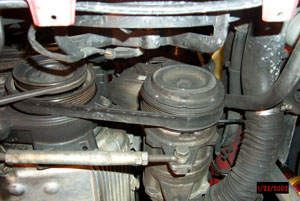
- Measure tightness of the belt that goes around the alternator/AC Compresssor/Crankshaft.
- Loosen the belt that goes around the alternator/AC Compresssor/Crankshaft. This is done by loosening the bolts around the metal tie rod that connects the block to the A/C compressor. It has two nuts on either side which you open up, then turn the tie rod to loosen the belt.
- Remove the tie rod to undo the belt.
- Remove the belt from the A/C compressor and alternator.
- Undo and remove the bolt on the bottom of the Alternator.
- Undo and remove the air hose that goes from the front fender area to the black plastic shroud housing that's on the back of the Alternator. This air is used to cool the alternator.
- you are done working from the bottom, for now at least ! so bring the car back down on the lift, you need to work from the top side now. good luck !
- Completely drain the coolant from the white plastic coolant reservoir using a hand pump, into a **clean** container because you'll need to put it back later !!!
- Remove the air box, Air-Flow Meter (AFM), hard black plastic air pipe that goes from intercooler to the plenum, and the black soft plastic air hose that goes from the air box to the turbo intake.
This step requires a bit of time since you will have to undo and remove many hose clamps and hoses to remove all the above mentioned items. So take your time and look at things before you undo everything under the hood !
- Be Organized now !
Also, some of the hoses that you have to disconnet have coolant in them, so it will spill out. Put the large pan under the car to catch any coolant that will leak.
- Loosen and remove the four bolts (two per side) that hold down the metal coolant cross over pipe. you can identify this metal pipe because it connects to the bottom front of the coolant reservoir tank and runs across the fron of the engine to the left hand side towards the water pump.
- Loosen the hose clamp on the hose that connects the cross over metal pipe to the coolant reservoir tank.
- Undo and remove the top bolt holding the alternator to the engine block.
- Loosen the alternator by juggling a large screwdriver between the alternator and the engine block.
- Remove the alternator about half way until you can get to the bolts that hold the rear shroud in place.
Easier said than done, so take a break now before you do this. you might need to disconnect some more hoses in the appropriate places to ease removal of the alternator.
- Remove the plack plastic shroud that covers the rear of the alternator by loosening the three lock nuts.
- Make careful note of the position of the two alternator wires. One is the thicker black wire, the other is a thinner blue wire.
- Remove the two wires attached to the alternator.
- now you can completely remove the alternator.
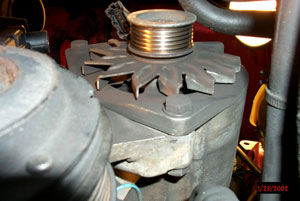
- Transfer the front rotating plate to the new Alternator from the old one.
- Put the shroud back inside the alternator area before installing the new alternator.
- Reattach the wires onto the new alternator.
- Slide the new alternator back into position.
Again, this is easier said than done, so be patient and take your time.
you might need to hammer the alternator back onto the engine block since it might be a tight fit.
- Put the rear shroud back on and install the two self locking nuts from the top. The third nut has to be done from the bottom.
- Insert the bolt that holds the alternator to the block from the top. Do NOT tighten yet !!!
- Jack up the car again.
- Install the bottom alternator bolt, do NOT tighten yet !
- Slip belt onto the alternator and A/C compressor.
- Install the third self locking nut onto the rear alternator shroud.
- tighten the bottom alternator bolt.
- Install air hose that goes from from fender area to the alternator shroud (the entry of which points down).
- Install and tighten the metal tie rod so that you get the proper tightness on the belt.
- Jack the car back down again.
- Tighten the top alternator bolt now.
- Install all the clamps and hoses that you took off.
Make sure you tighten all the hose clamps, check them to make sure since most of them are operating under high pressure.
- Re-Install all the other stuff that was taken off (air hoses, intercooler hose, AFM and air-box).
- Pump back the coolant into the reservoir. Top it up if some coolant leaked onto the floor when you were undoing some of the coolant hoses.
- Clean up any coolant leaks in the engine compartment. Double check all connections and hoses and bolts again.
- Clean up any coolant leaks in the engine compartment. then put the under trays back on the bottom of the car.
- Take care down from the lift or jack, and reconnect the battery terminals, Positive side first.
- Start the engine and check to make sure everything is running OK. Turn on all the lights, A/C, rear defrost , etc. and check the volt meter to see if your are getting around 13.5 Volts or so for charging.
Images:
Application: 924/944/968 all
Tools: 2 sets of metric wrenches, short metric socket wrenches with extenders, long metric socket wrenches with extenders, flathead, phillips, Jack and Jack stands, shop rags, extra hose clamps, Anti-Freeze/Coolant, (Phosphate-Free), Large pan under the car, Large Flat head hammer, small Hand pump to pump coolant(?)
Credits: Nabi Rafie
| Related Articles |
> Window Express Kit Installation
> AC Delete
> Accusump Installation
> Adjustable Ride Height Kit - Paragon
> Brakes, front - 924S, 944, 944S
> Brey-Krause Strut Brace Installation - 944
> Camber Plate Installation (Paragon)
> Clock/Bulb Replacement, digital, Late 944 and 968
> Clutch Replacement - Part One
> Clutch Replacement - Part Two
> Clutch Slave Bleeder Valve Remote
> Control Arm Bushing Upgrade - Weltmeister
> Control Arm, Front - Info
> Coolant Flush
> DME Chip Installation
> Dash Replacement
> Engine Identification
> Engine Production
> Fuel Level Sender
> KLA Strut Brace Installation - 924S, 944, 968
> Koni Strut Conversion - 8641-1414S for late 944, 968
> Motor Mount Replacement
> Odometer Gear Replacement - late 944
> Oil Cooling, Auxiliary
> Oil Pressure Relief Valve
> Oil Pressure Sending Unit Replacement
> Rear Ride Height Adjustment
> Porsche Chronology
> Rear Spring Rates vs. Effective Rates
> Rear Wheel Bearing Diagnosis
> Rear Wheel Bearing Replacement - 924, early 944
> Rear Wheel Bearing Replacement - late 944, 968
> Ride Height Measurement
> Rod Bearing Replacement
> Shift Lever Rebuild
> Short Shift Kit
> Throttle Position Sensor
> Sway Bars - Info
> Torque Tube Rebuild
> Torsion Bar Replacement
> Transaxle Fluid - Info
> Transaxle Fluid Change
> Rear Sway Bar Installation
> Transaxle Replacement
> Heater Clip
> Window Regulator Replacement
> Seat Back Brace Installation Instructions
> KLA Strut Brace Installation - 968/944 S2/944 S
|
|
